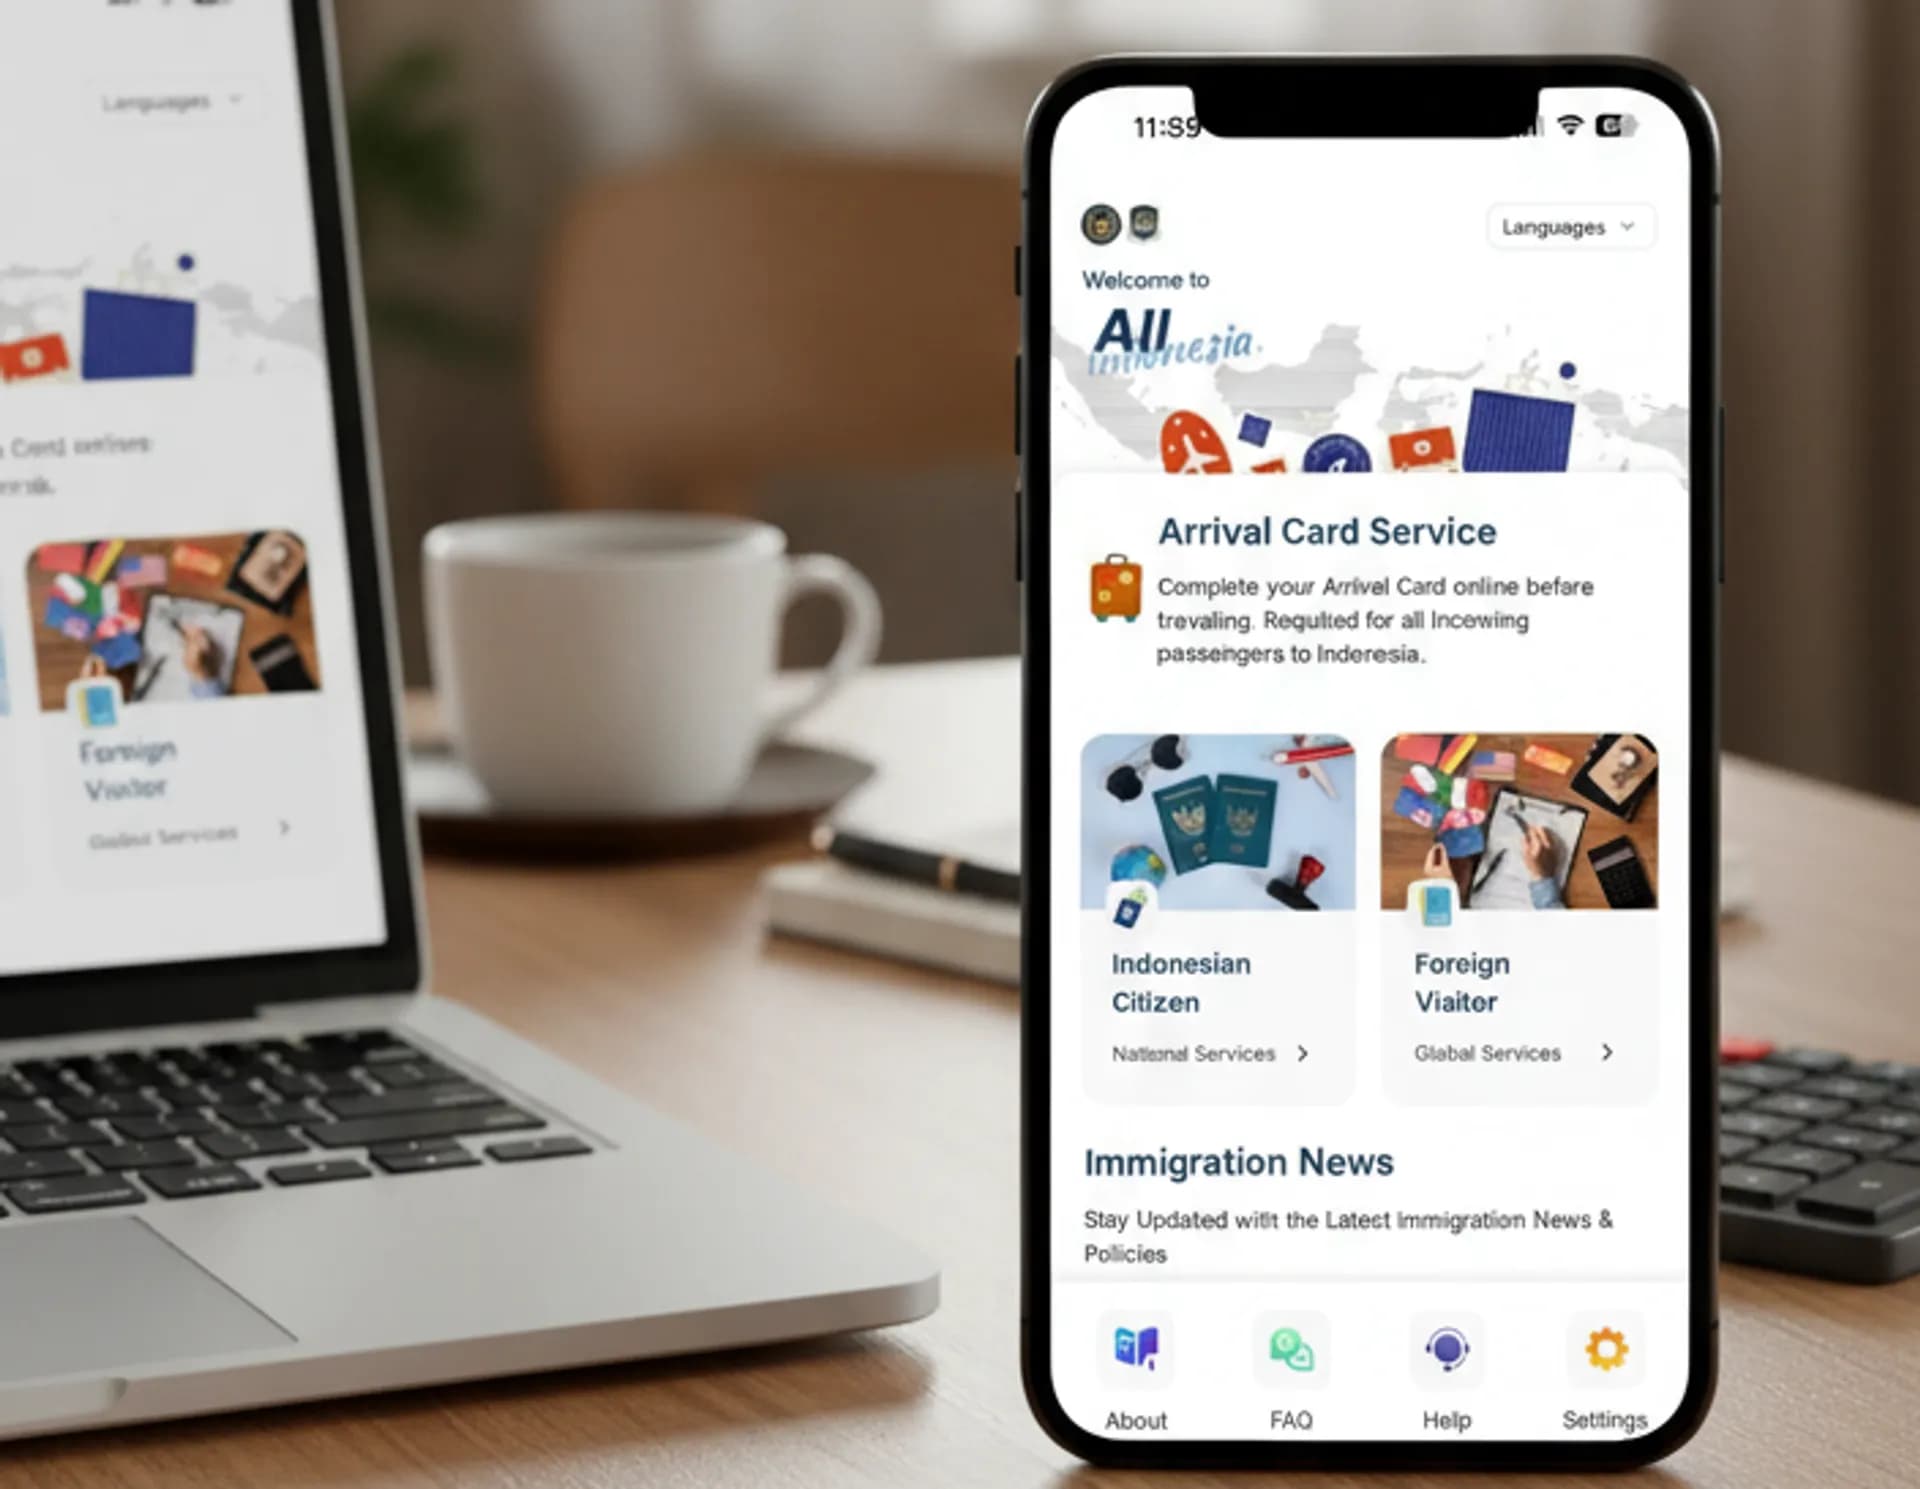
Receiving your visa (or visa-on-arrival / e-Visa) is just the first step of your journey. The process isn’t over until you’ve cleared immigration, health, and customs on arrival in Indonesia. From late 2025 onwards, the country is rolling out a unified digital arrivals system to make that smoother. Below is a step-by-step guide covering what to expect and how to prepare.
Prepare in Advance - Complete the “All Indonesia Arrival Card”
As of September 1, 2025, Indonesia has introduced the All Indonesia digital arrival card system, which unifies immigration, customs, and health declarations into a single online form.
Why this matters:
It replaces older systems like separate health declaration (SATUSEHAT) and e-CD (customs declaration) forms.
It’s mandatory for all international arrivals (tourists, business travellers, returning Indonesians) at participating airports.
Use within 72 hours before arrival (i.e. fill it out not too early, but in advance).
On submission, you’ll receive a QR code (print or screenshot) to present upon arrival.
How to fill the All Indonesia Arrival Card:
Access the portal or app
Go to the official site: allindonesia.imigrasi.go.id or download the All Indonesia mobile app (available for Android / iOS).
Choose “Foreign Visitor” (for non-Indonesians)
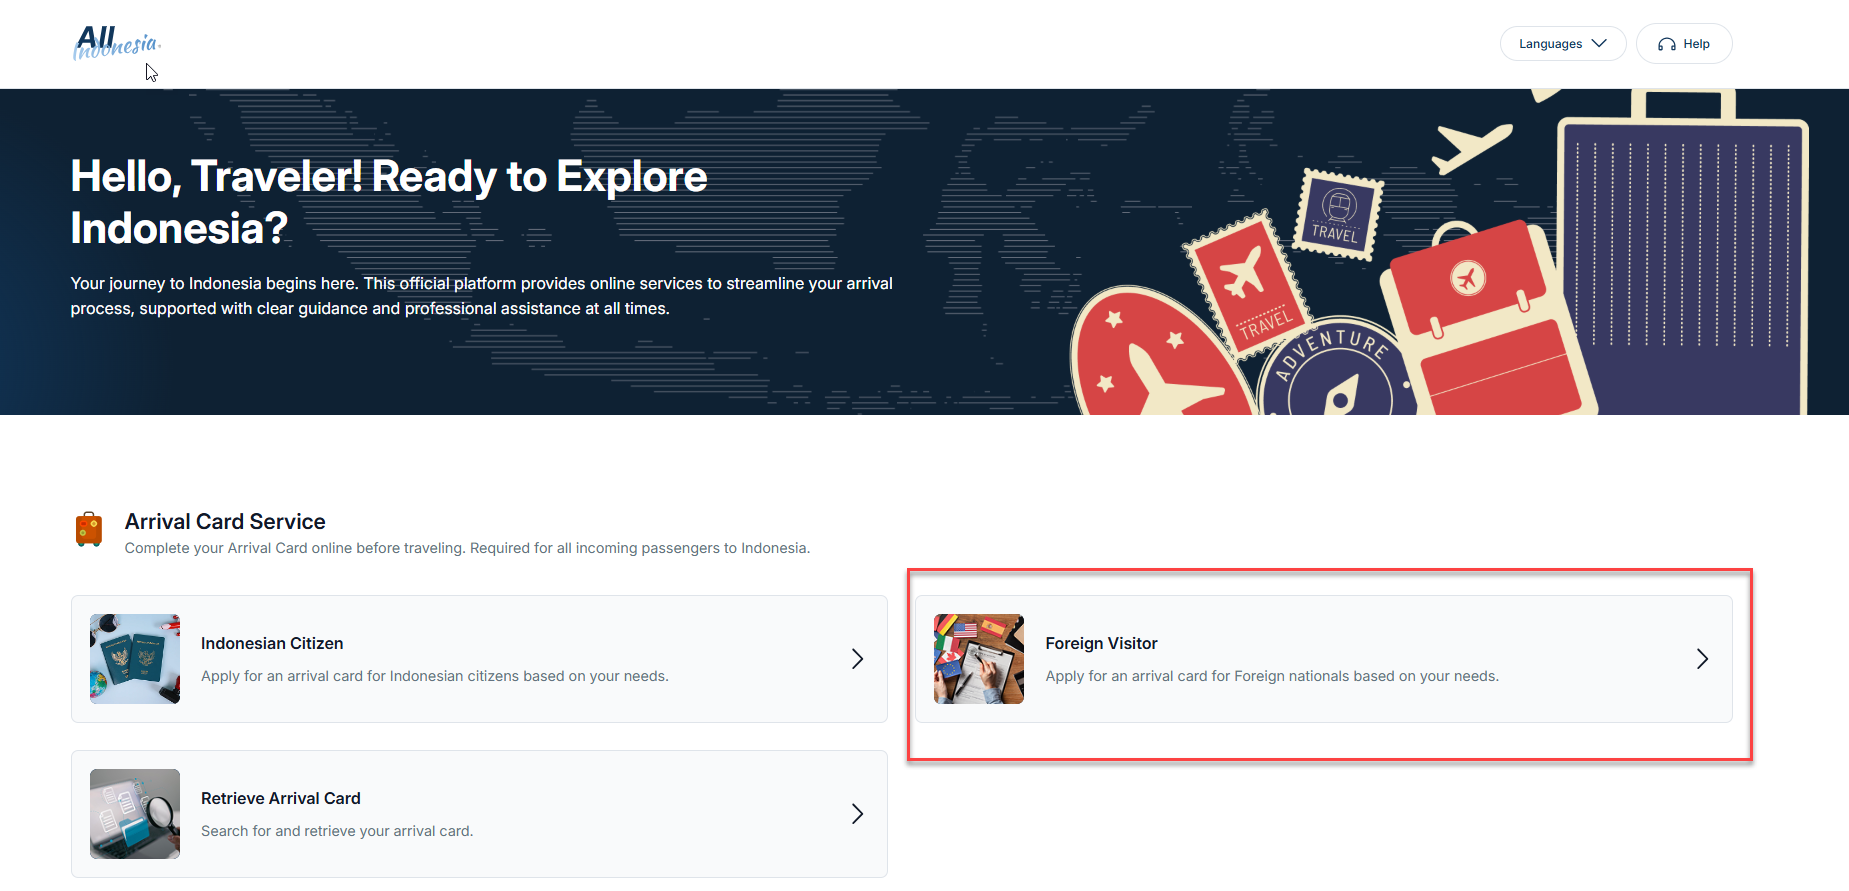
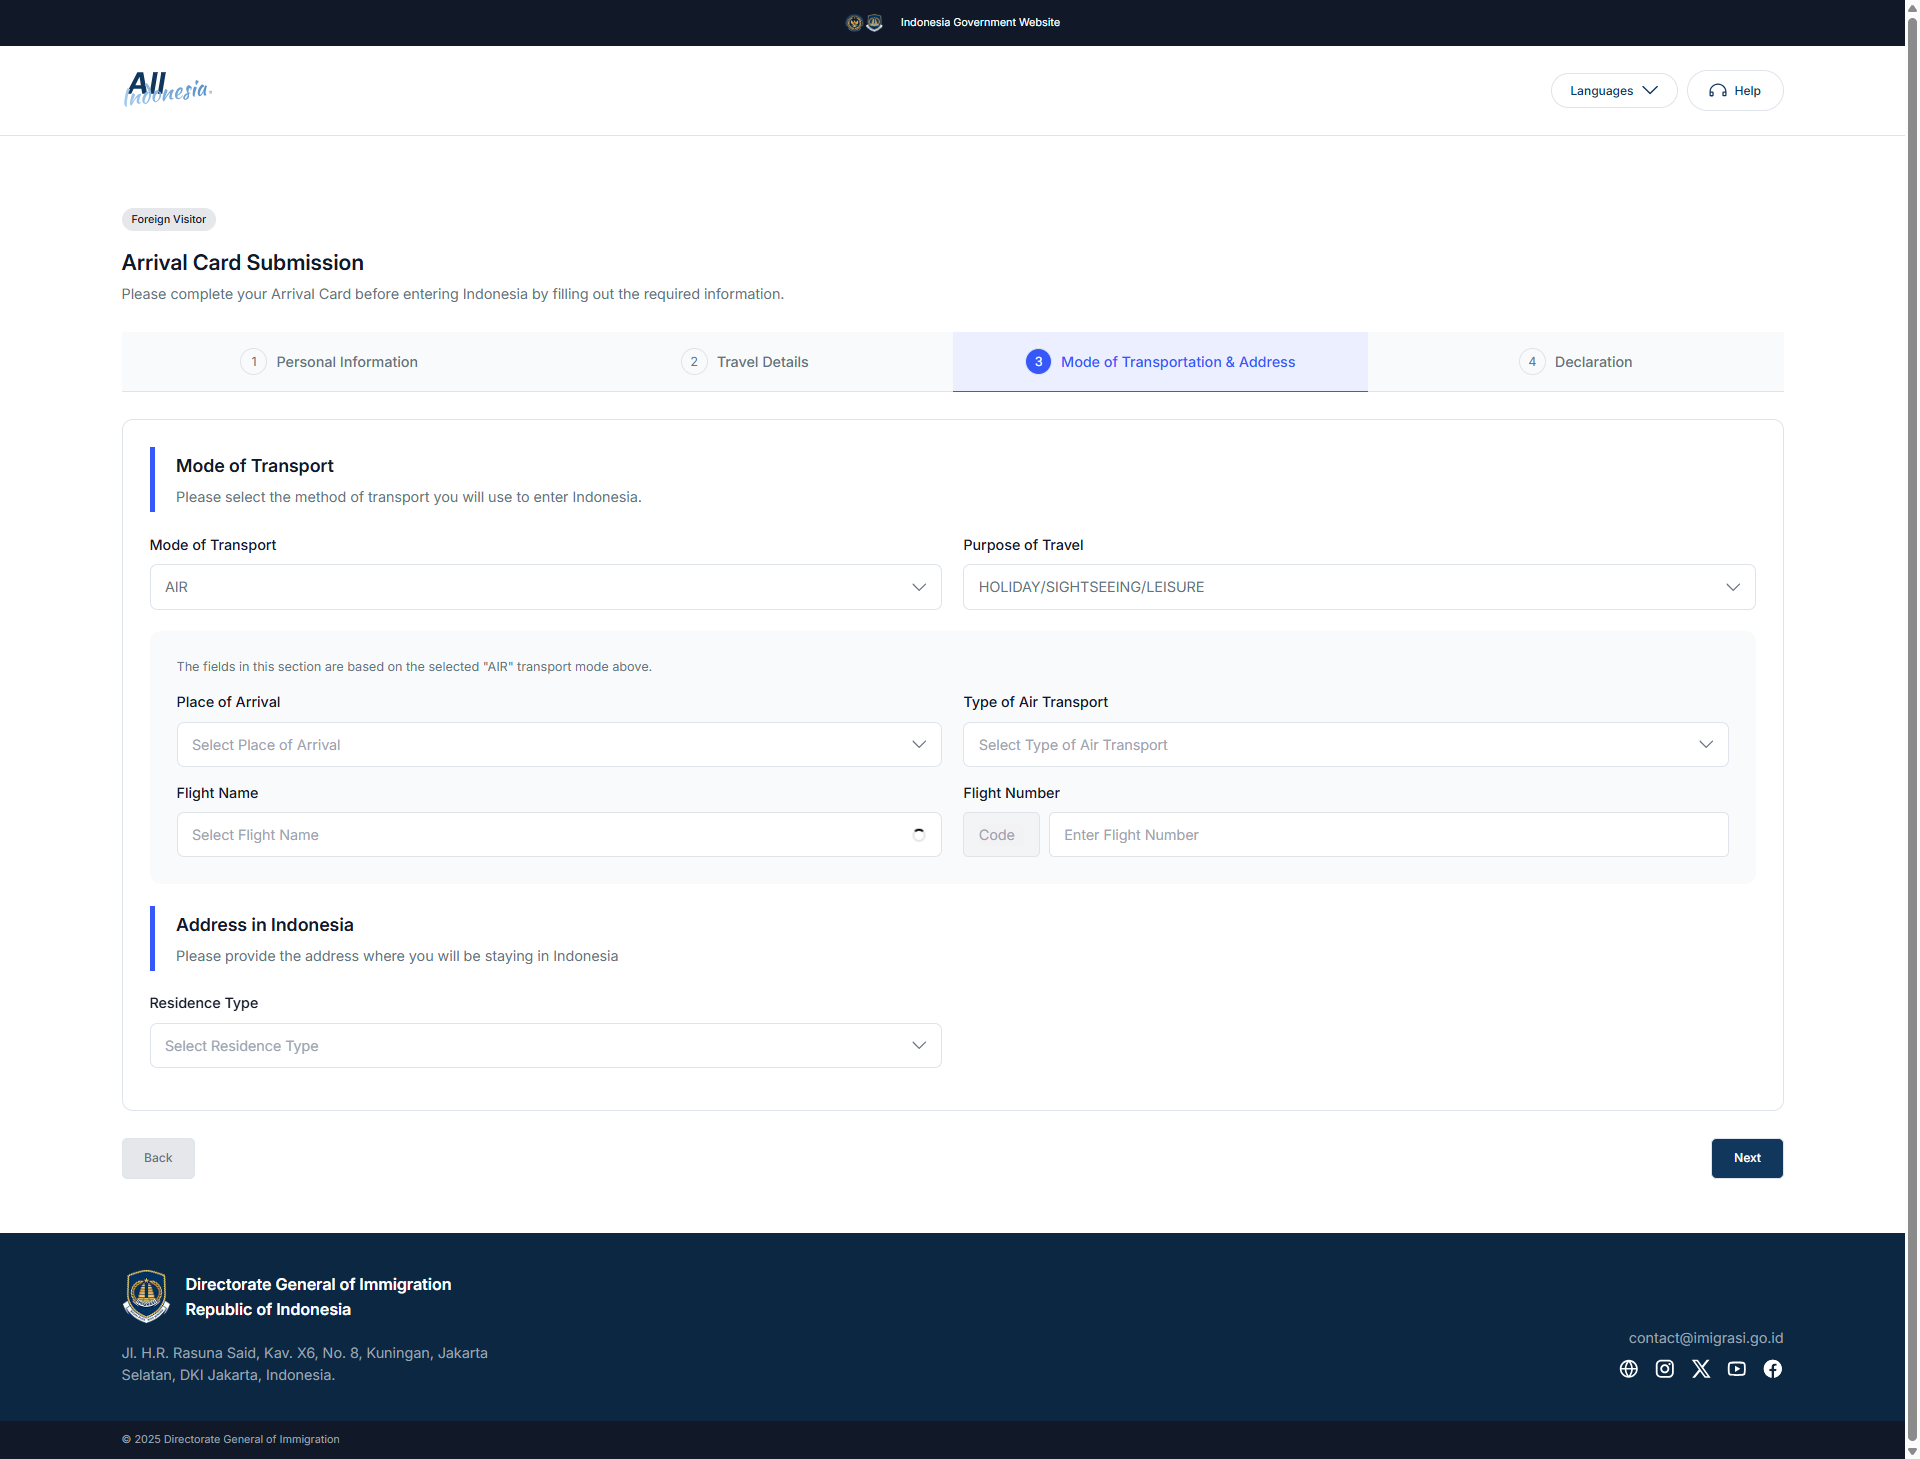
Fill in your basic travel & personal details
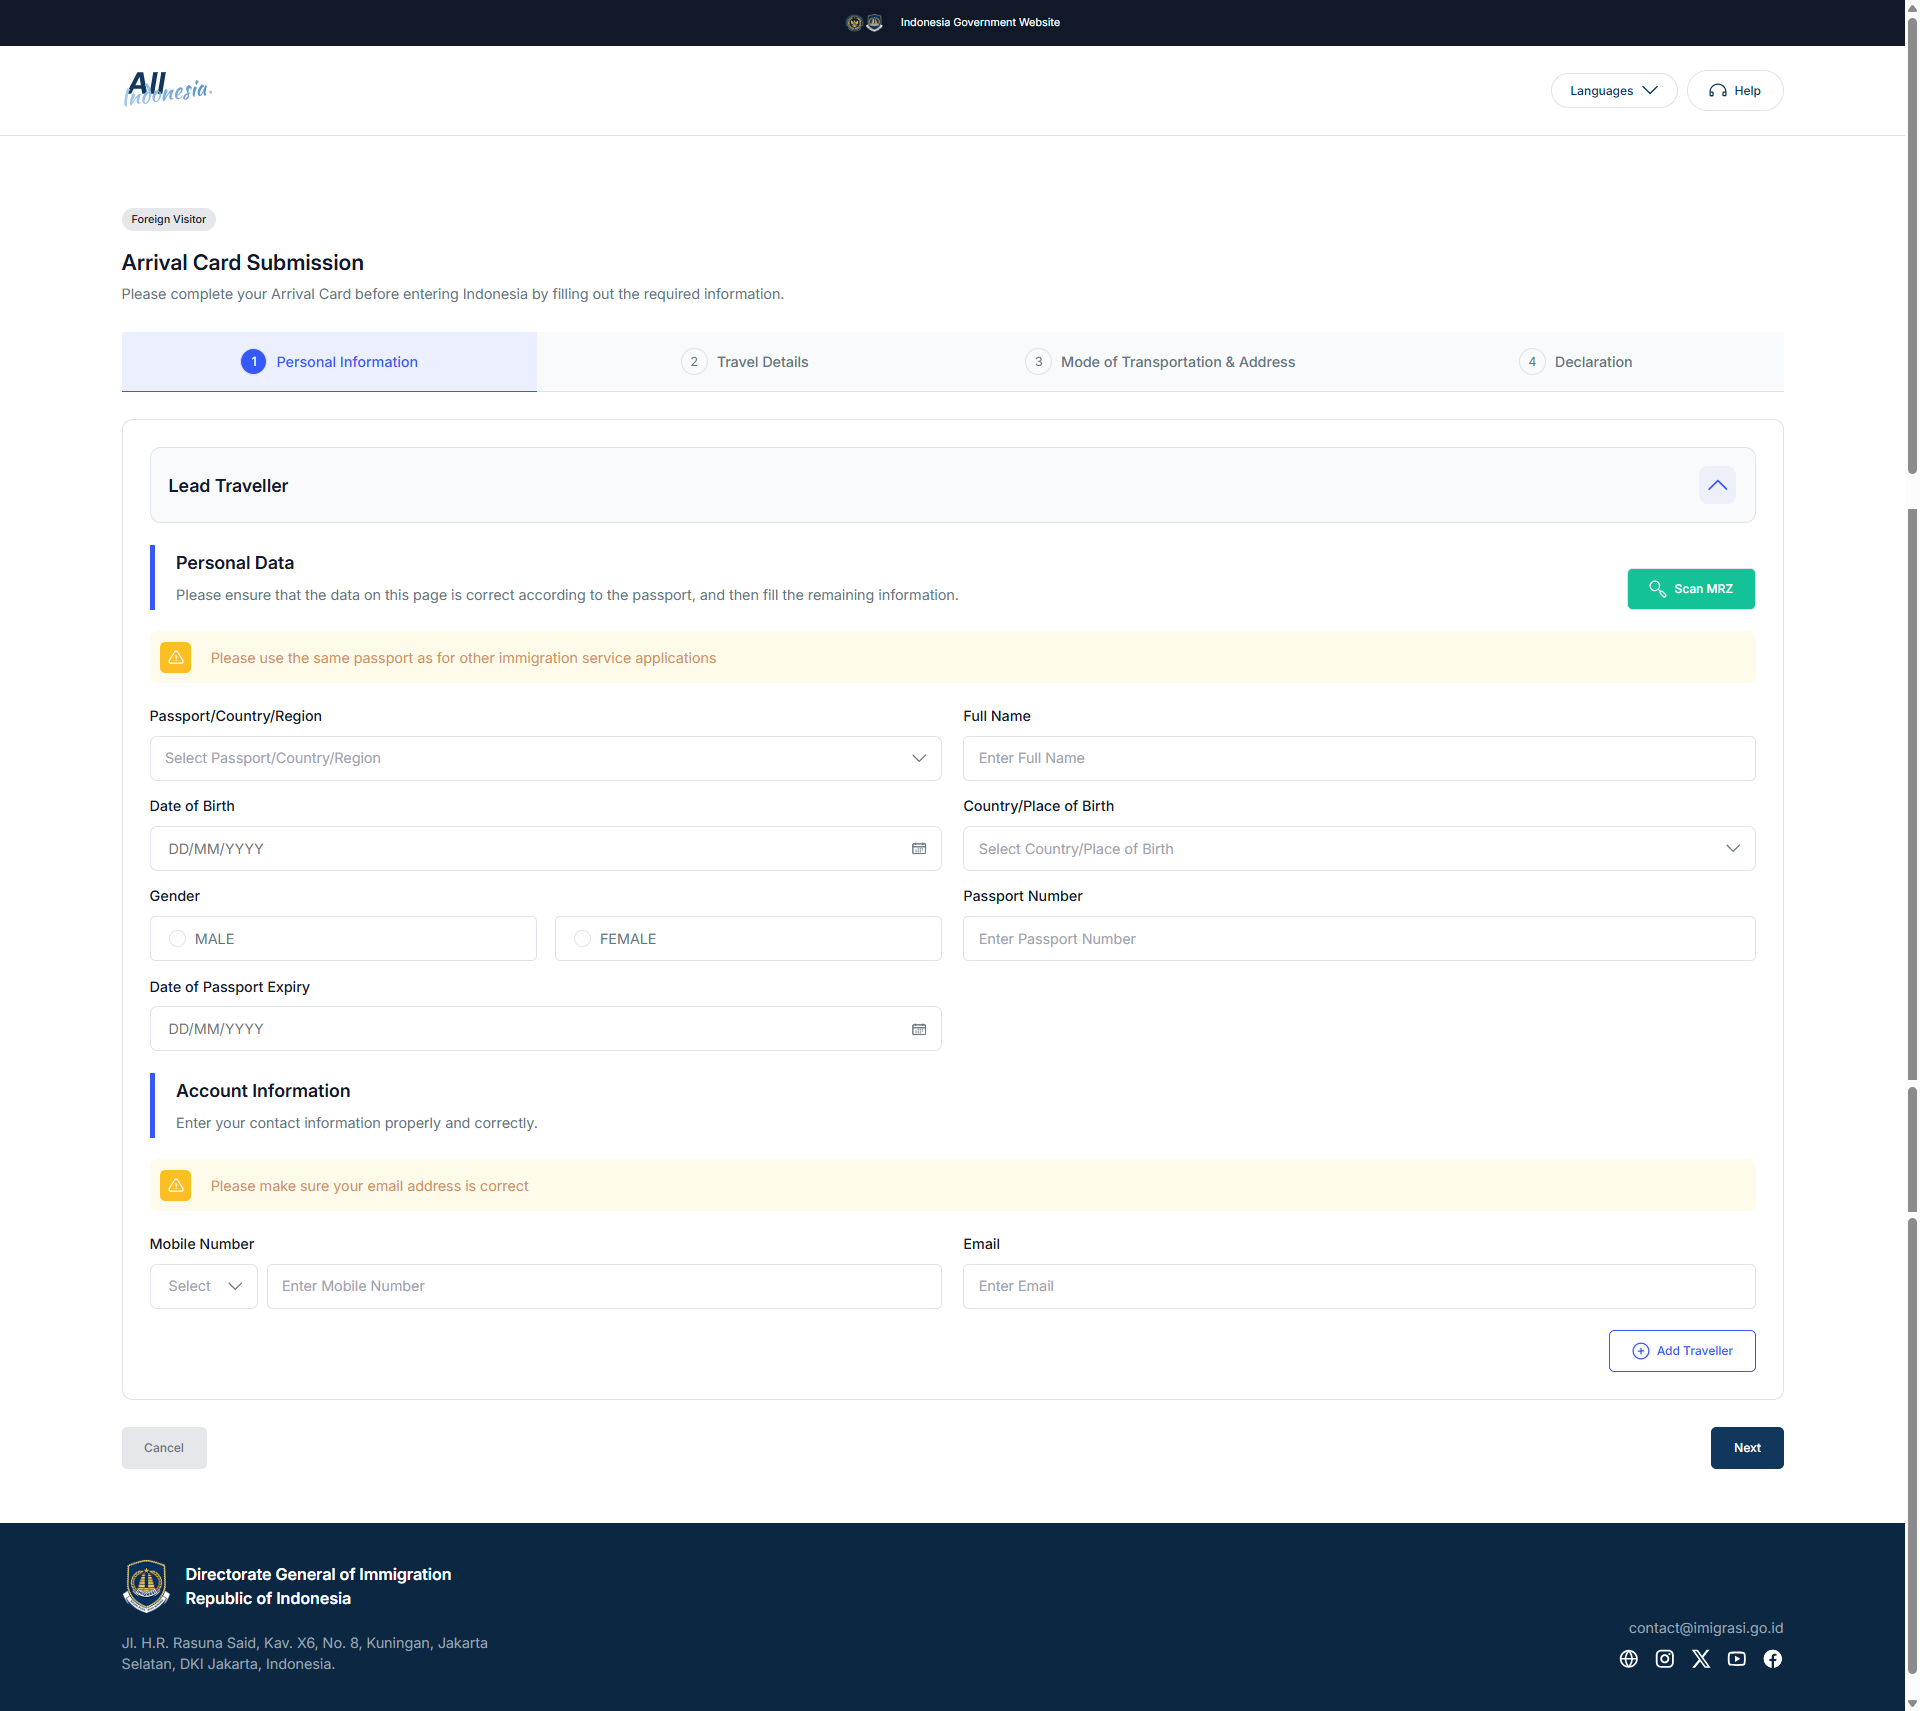
You will be asked for:
Personal info (name, passport number, nationality, date of birth)
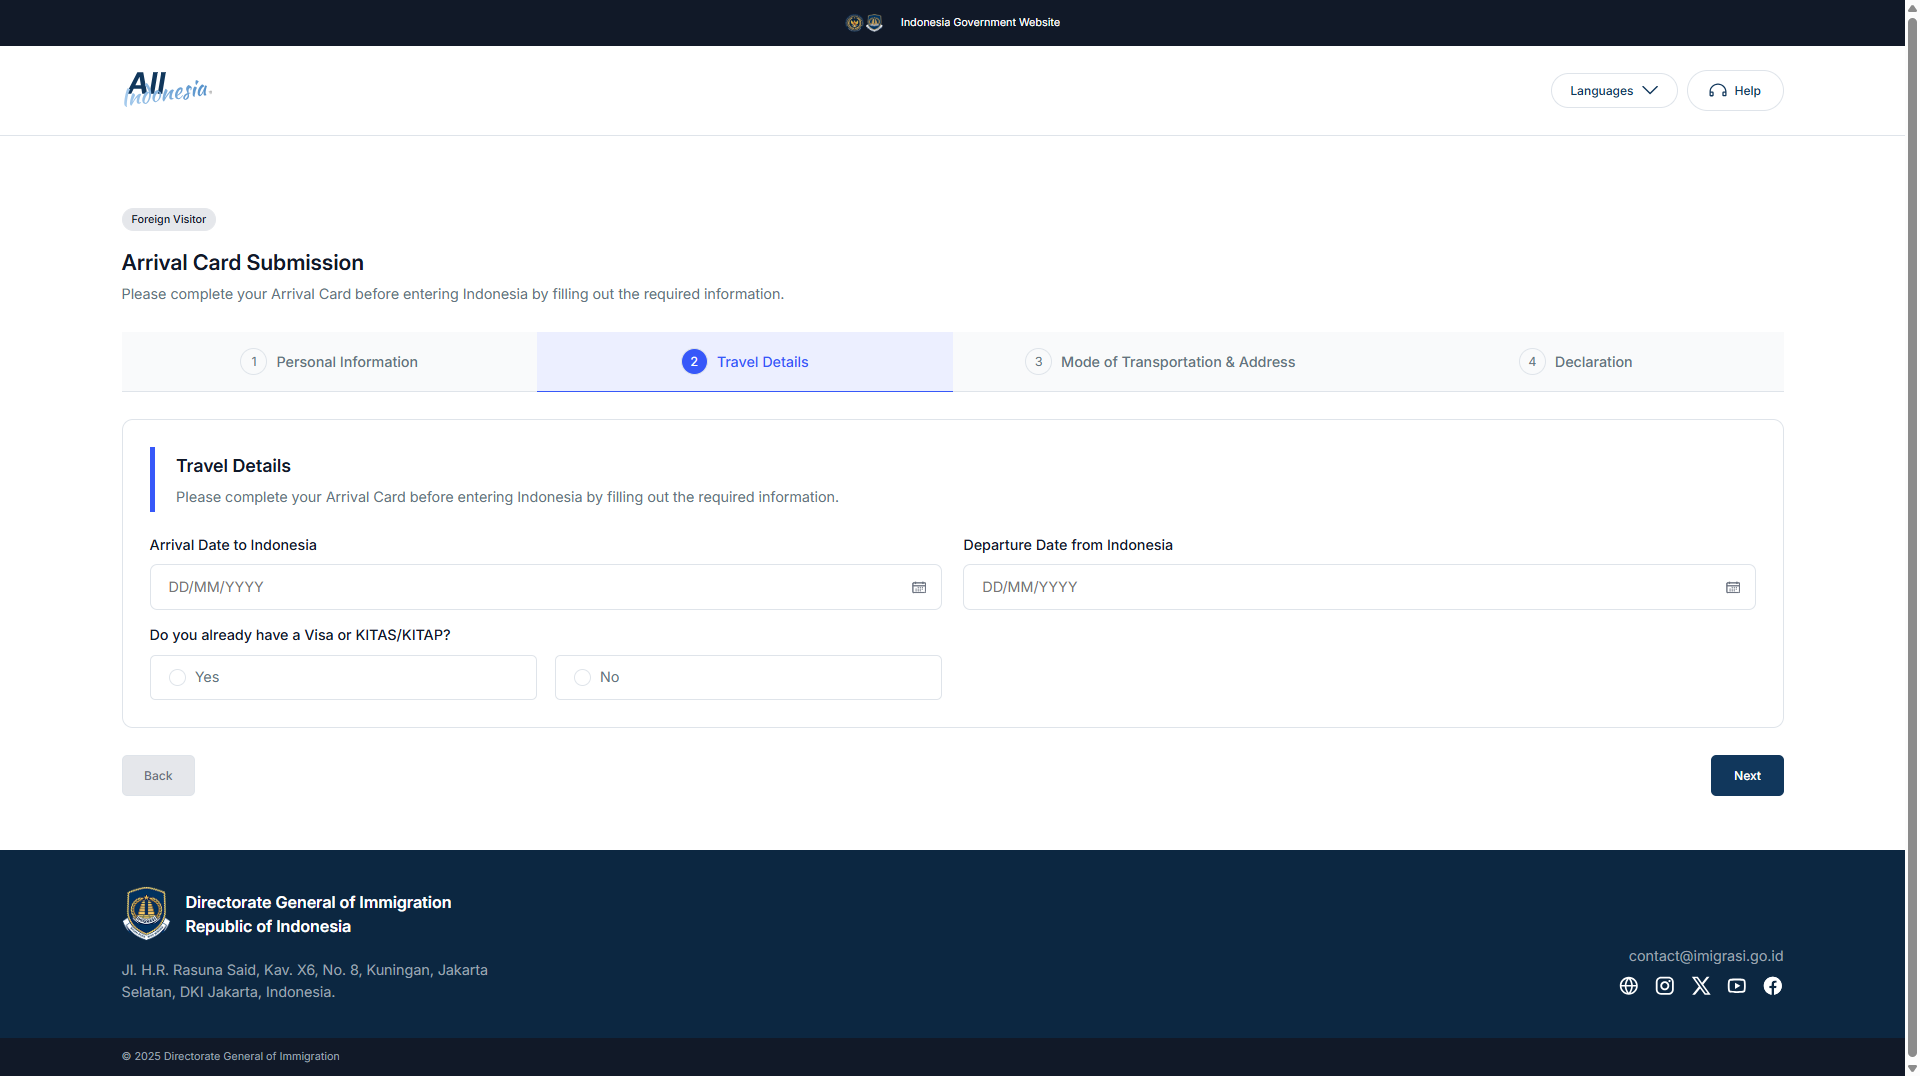
Travel & visa info (arrival/departure dates, visa or permit number)
Transport & accommodation (flight or ship, hotel address)
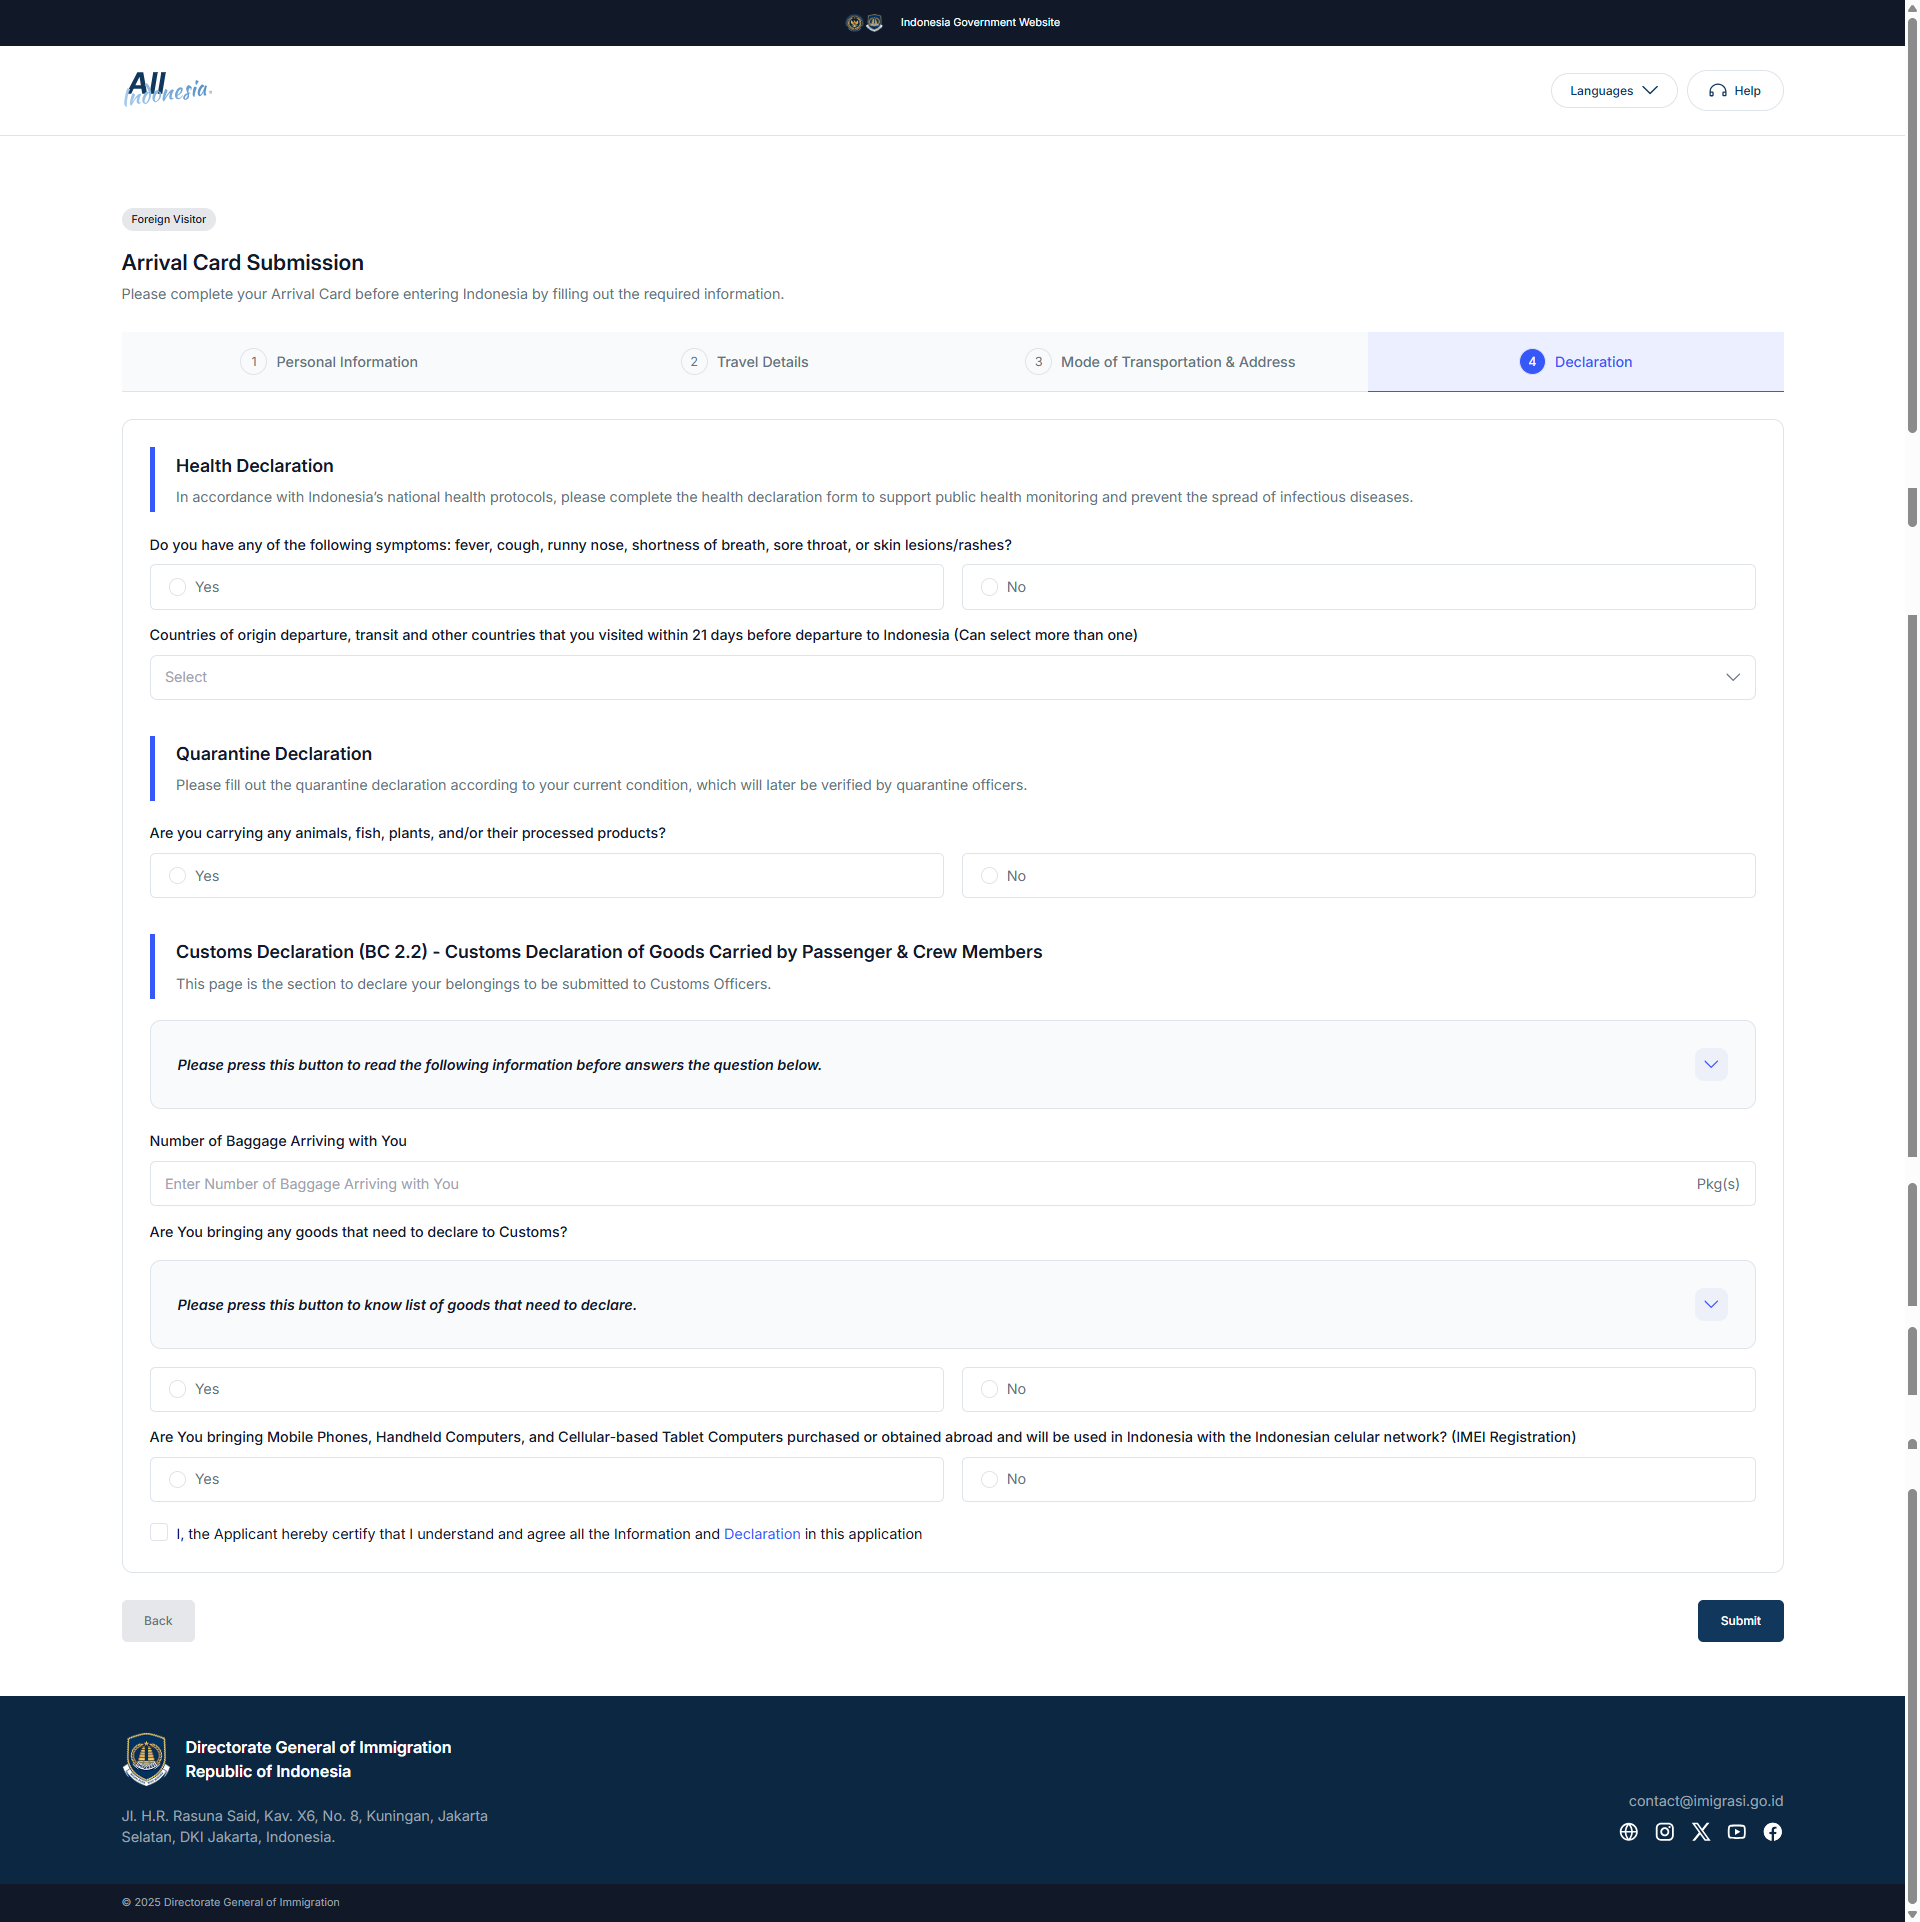
Health & customs declarations combined
In the same form, you’ll answer questions about:
Recent travel / health status
Items or goods you carry that may need declaration (e.g. cash, restricted items, flora, electronic devices)
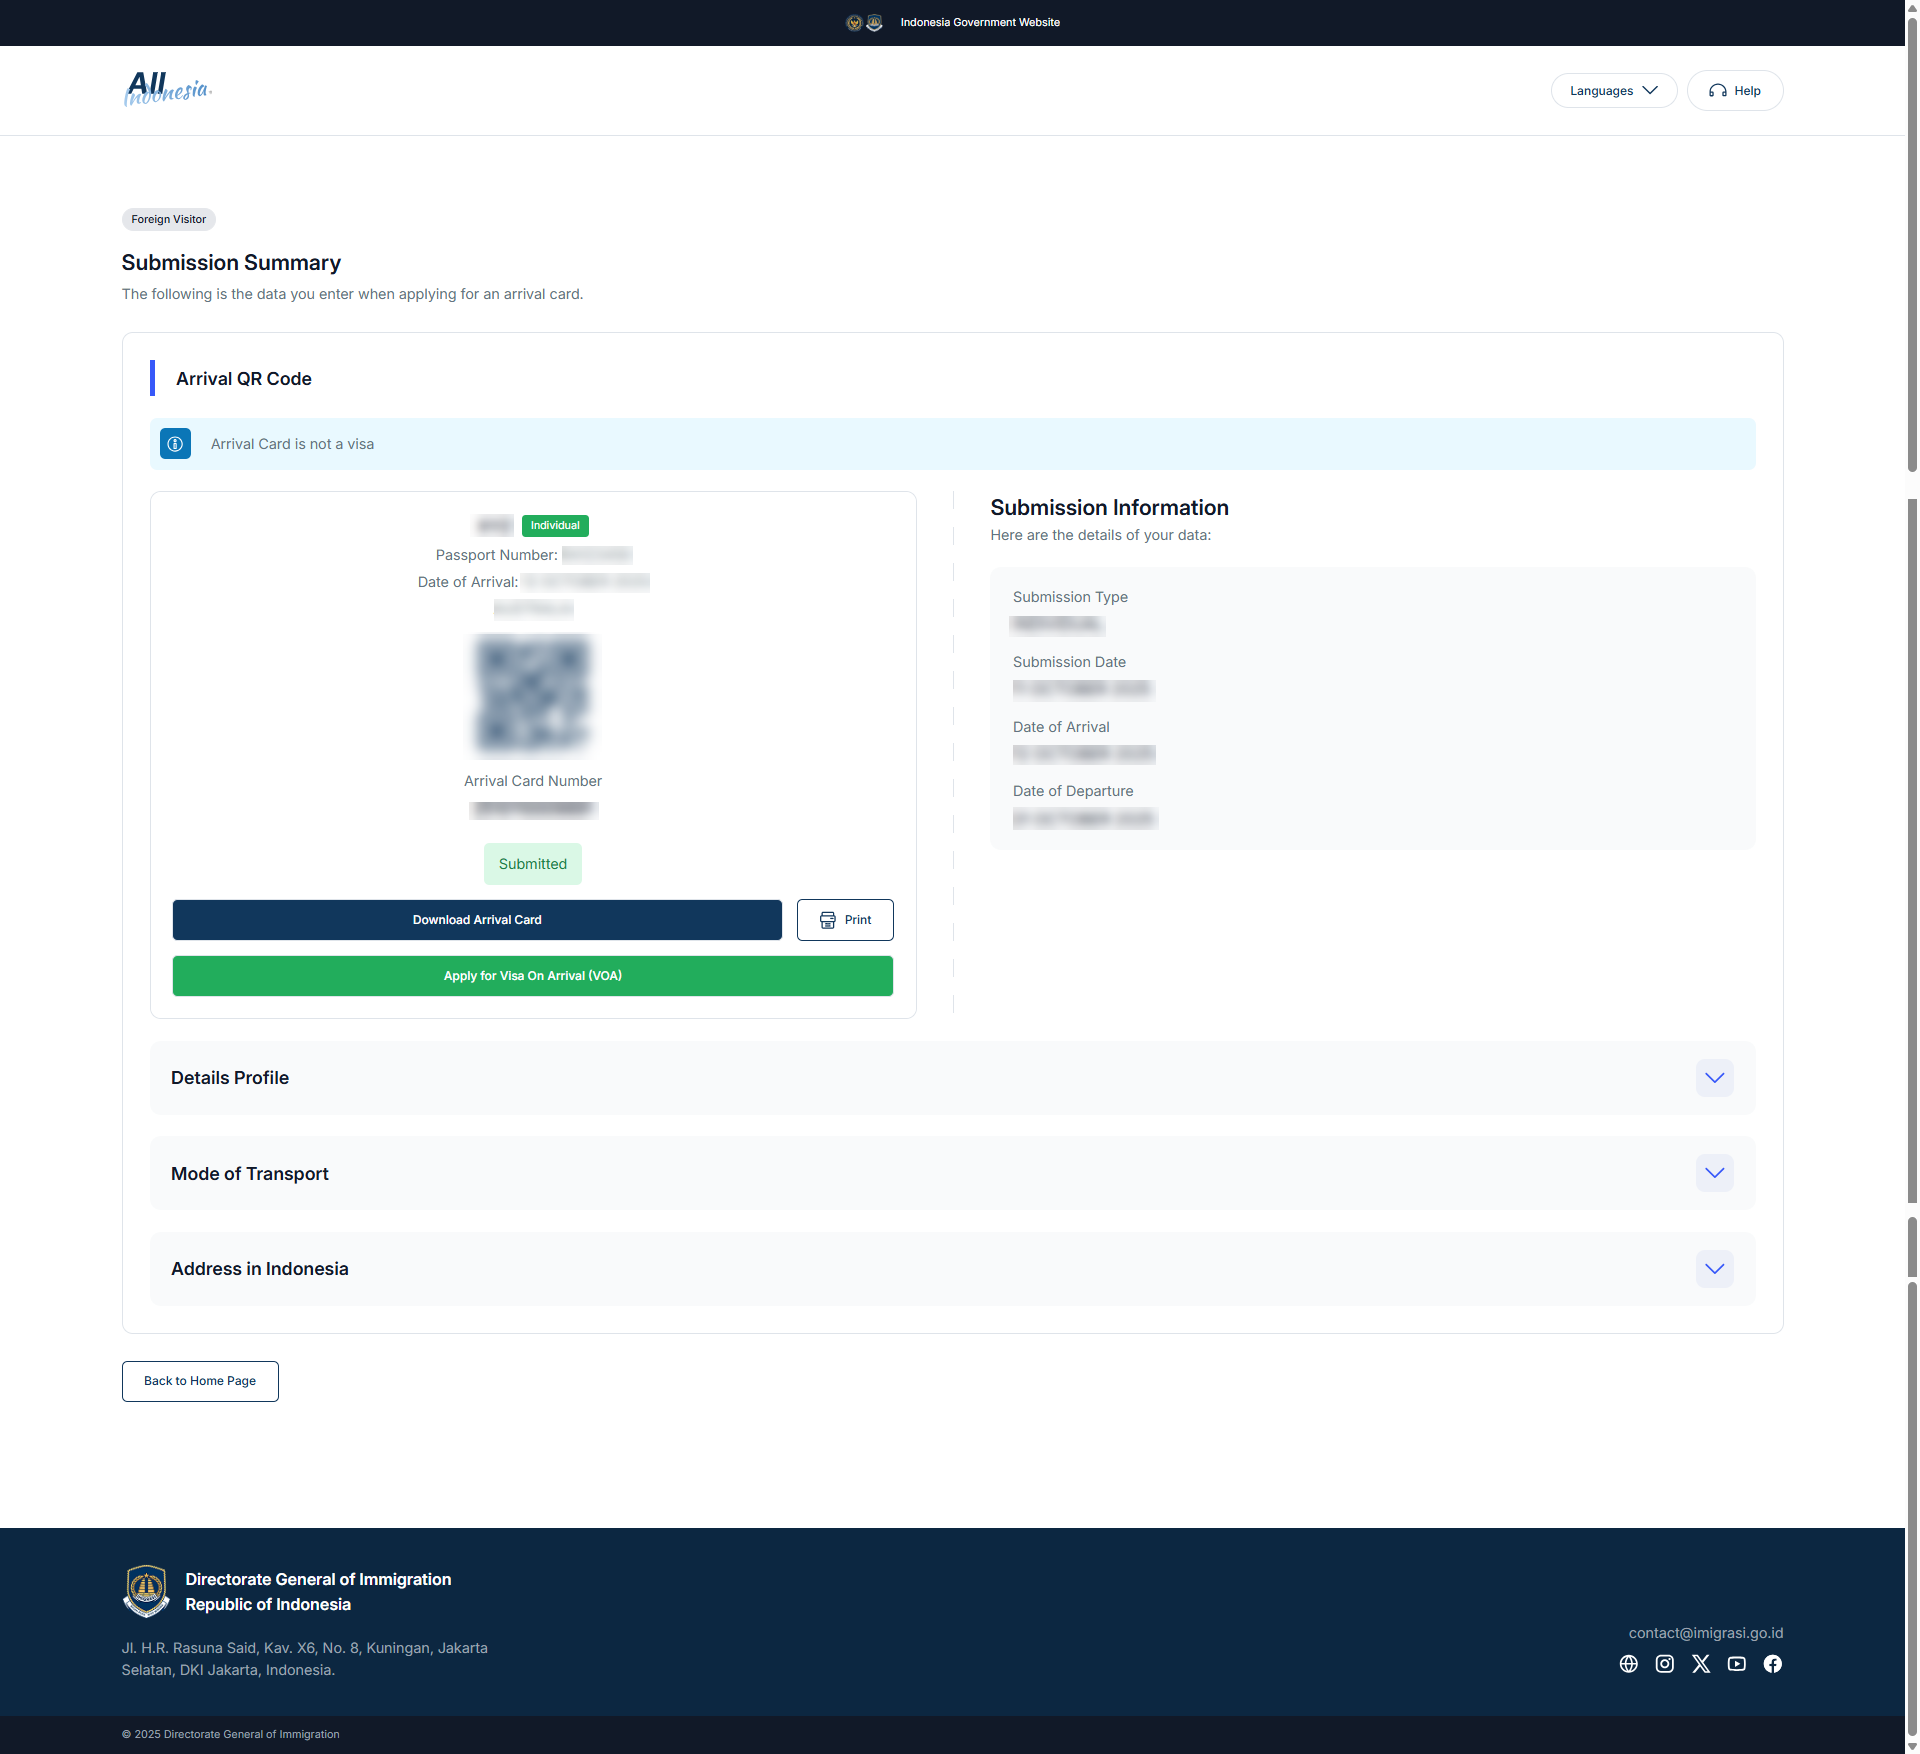
Submit & receive QR code
After you submit, the system generates a QR code. Save or print it. You’ll present it to immigration/customs officials on arrival.
Check for updates or expansions
Initially, the system is fully in force at major airports (e.g. Bali, Jakarta, Surabaya). From October 1, 2025, it will roll out to all international entry points.
Important reminders:
This arrival card is not a visa - you still need the correct visa or permit to enter. For Indonesia visa you can visit MyVisitVisa for a smooth and hassle free Indonesia visa approval.
It’s free of charge on the official site - watch for scam sites that charge fees.
You may use the MRZ (Machine Readable Zone) scan to auto-fill passport details if using the app.
If you are travelling to Bali then you need to pay the Bali Tourism levy which can be paid through Lovebali. This levy can be paid beforehand or can be paid in the Airport on arrival.
For a smooth and hassle-free Indonesia visa approval you can apply your Indonesia visa through MyVisitVisa |
Arrival - Airport / Port Entry (Immigration & Customs)
Once your flight lands (or ship docks), you go through a multi-stage entry process. Here’s what to expect, and how to use the QR code and your visa.
A. Disembarkation & initial screening
Follow signs toward Immigration / Passport Control.
At some major Indonesian airports, autogate / automated border control is available (for e-passport holders and those with valid visas) to speed up the process.
If autogate is available and you're eligible, your passport and face/fingerprint biometrics may be scanned; otherwise, proceed via the manual immigration lane.
B. Present your documents & QR code
At immigration, present:
Your passport
Visa / e-Visa / VOA / permit
QR code from the All Indonesia Arrival Card
Immigration staff will scan your QR code, verify your visa/permit status, and may ask basic questions (purpose, length of stay).
If everything checks out, they will stamp your entry (if required) or record your entry through the system.
C. Baggage claim & screening
Collect your checked luggage
Sometimes there is an X-ray / baggage screening station before customs - especially for selected flights/airports
D. Customs inspection & exit
Proceed to Customs / Quarantine / Health area
Customs officers may ask to see your QR code and compare against your declared items
They might inspect or open your luggage if they suspect undeclared restricted items
After clearing customs, you exit into the public arrivals hall
If you fail to declare restricted or prohibited items (or exceed limits of duty‐free allowances), penalties (fines, confiscation) may apply.
After Entry - Onward Within Indonesia
Once you're admitted into Indonesia, these are typical post-entry steps and best practices:
Keep your entry stamp / record - you may need to show it during internal travel (e.g. domestic flights, police checks).
Register your stay (if in some local jurisdictions this is required - check local rules)
Follow visa conditions - e.g. maximum duration, no overstay
Pay any tourist levies or local fees (e.g. Bali tourist levy) if applicable
Carry your documents (passport, visa, QR code receipt) when traveling domestically, if required
Common Issues & Troubleshooting Tips
Problem Possible Cause Suggested Solution | ||
QR code not accepted at immigration | Fill in form after deadline / using wrong portal | Verify you used the official All Indonesia site/app, submitted within 72h, and have a clear screenshot/printout |
Customs requests extra checks | Declared item seems suspicious | Cooperate, show receipts/docs, be honest - paying duties/fines may resolve issue |
Autogate denies access | Passport not e-passport or visa not compatible | Use manual immigration lane |
Arrival card/permitting forms missing | Didn’t complete All Indonesia form | Officials may require you to fill it on the spot (delaying your entry) |
Overstay issues | Exceeding permitted visa duration | Seek extension through immigration before expiry |
Sample Timeline (for a traveller arriving in Bali)
72 hours before flight - Complete the All Indonesia Arrival Card form → receive QR code
Day of flight - Have passport, visa, QR code (print or digital) ready
Upon arrival:
Immigrations: scan QR, visa check
Baggage claim - customs inspection
Exit to arrivals hall
During stay - comply with visa rules, carry documents, pay local tourism levies
Before departure/exit - Present passport and exit stamp at departure immigration
Tips for Smooth Arrival Experience
Always use the official portal / app, for arrival cards don’t rely on third-party sites.
Fill the arrival card within the recommended window (72 hours before entry).
Save multiple copies of the QR code (screenshot, print) for backup.
Ensure your visa or permit is valid, matches travel dates.
Declare honestly - better to over-declare than hide something.
At Autogate-capable airports, check if you fulfil the requirements (e-passport, visa type).
Arrive with all documents easily accessible (passport, visa, QR).
If in doubt, ask airport staff to guide you.
How MyVisitVisa Helps You
At MyVisitVisa, we make your Indonesia trip stress-free from start to finish. Our services include:
Visa application assistance - ensuring your Indonesia visa is approved smoothly.
Guidance on completing the All Indonesia Arrival Card - we walk you through every field, including customs declarations, health info, and local levies.
Travel support - answering questions about the arrival process, customs, and immigration so you can land in Indonesia with confidence.
With MyVisitVisa, you don’t just get a visa - you get peace of mind and step-by-step guidance for a hassle-free entry into Indonesia.